Install Ubuntu Server
Install the free operating system your server runs on, using a USB stick and your keyboard.
On this page
Ubuntu Server is the free operating system your game server runs on. You install it on your spare computer from a USB stick. Every screen of the installer is pictured below, in order.
This wipes everything on that computer. Make sure there’s nothing on it you want to keep.
Step 1: Download Ubuntu Server
- On your normal computer, go to the Ubuntu Server download page.
- Download Ubuntu Server 26.04 LTS. You’ll get a file ending in
.iso. It’s a few gigabytes, so it takes a while.
LTS stands for long-term support. Ubuntu keeps sending security updates to an LTS version for five years.
Step 2: Put it on your USB stick
You need a free tool that copies Ubuntu onto the USB stick, so the computer can start up from it. Any of these work:
- Raspberry Pi Imager (Windows, Mac). Choose Use custom and pick the
.isoyou downloaded. - balenaEtcher (Windows, Mac, Linux).
- Rufus (Windows only).
Once you’ve installed one, copy Ubuntu onto the stick:
- Plug in a USB stick you don’t mind erasing. Everything on it gets wiped.
- Open the tool, choose the Ubuntu
.isofile, choose your USB stick, and start writing. - Wait for the tool to say it’s finished.
Step 3: Start your spare computer from the USB
- Plug the USB stick into your spare computer.
- Turn the computer on and start tapping the boot menu key straight away. It’s usually F12, F2, Esc, or Del. The right key often flashes on screen for a second at power on.
- In the boot menu, choose your USB stick.
If it boots into the old operating system instead, restart and try the key again. It can take a couple of tries to catch the timing.
Step 4: Run the installer
The installer is plain text on a colored background, and there’s no mouse. You move between options with the arrow keys and confirm with Enter. On most screens the default is right, and you finish the screen by choosing Done at the bottom.
Here is every screen in order:
Language. Pick yours and press Enter.
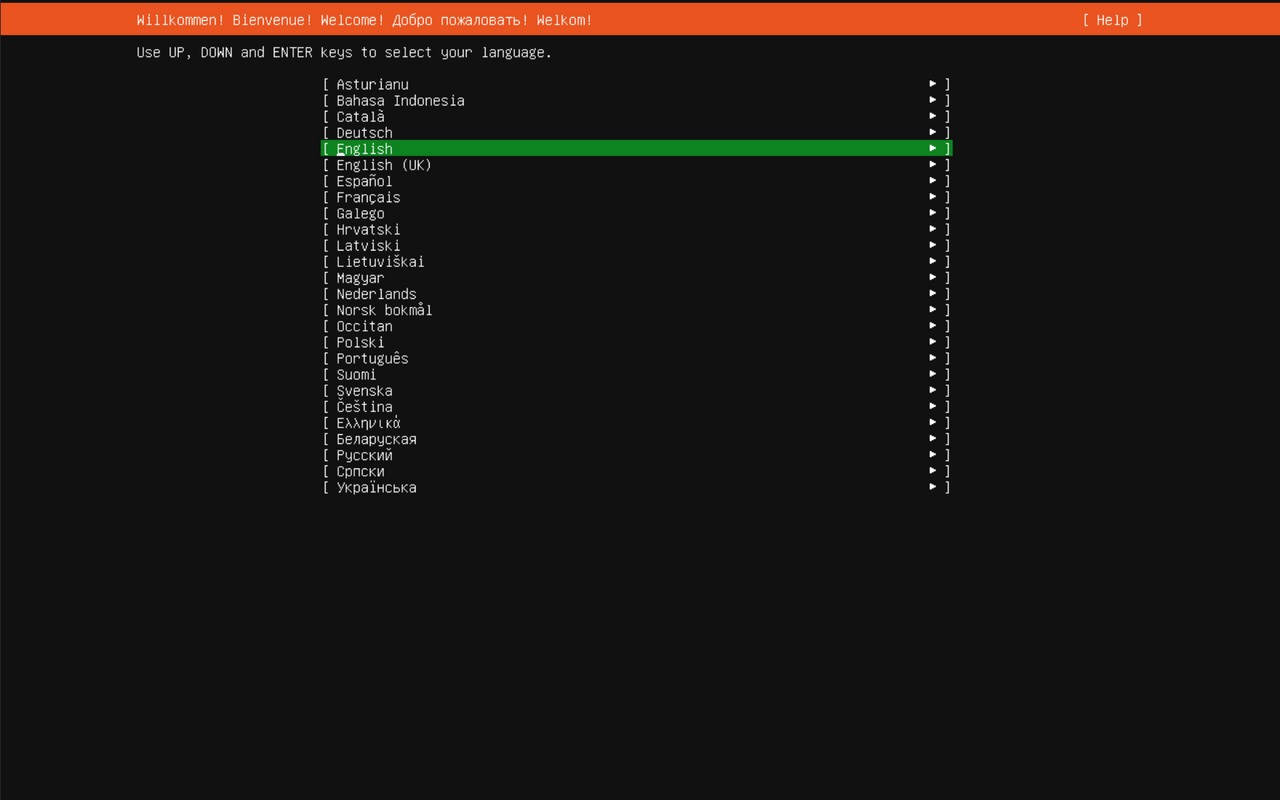
Keyboard. The default usually matches the language you picked. Choose Done.
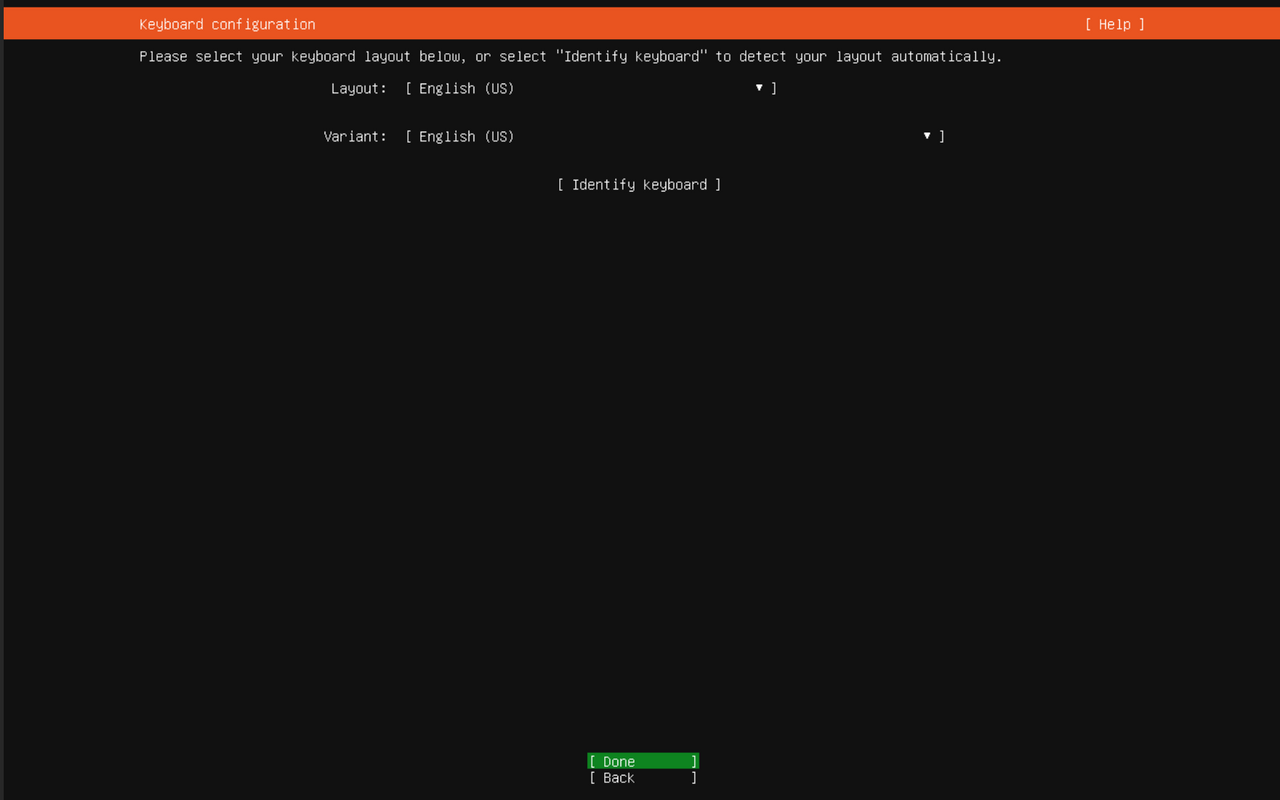
Type of install. Leave Ubuntu Server selected, not the minimized version. Leave Search for third-party drivers unchecked.
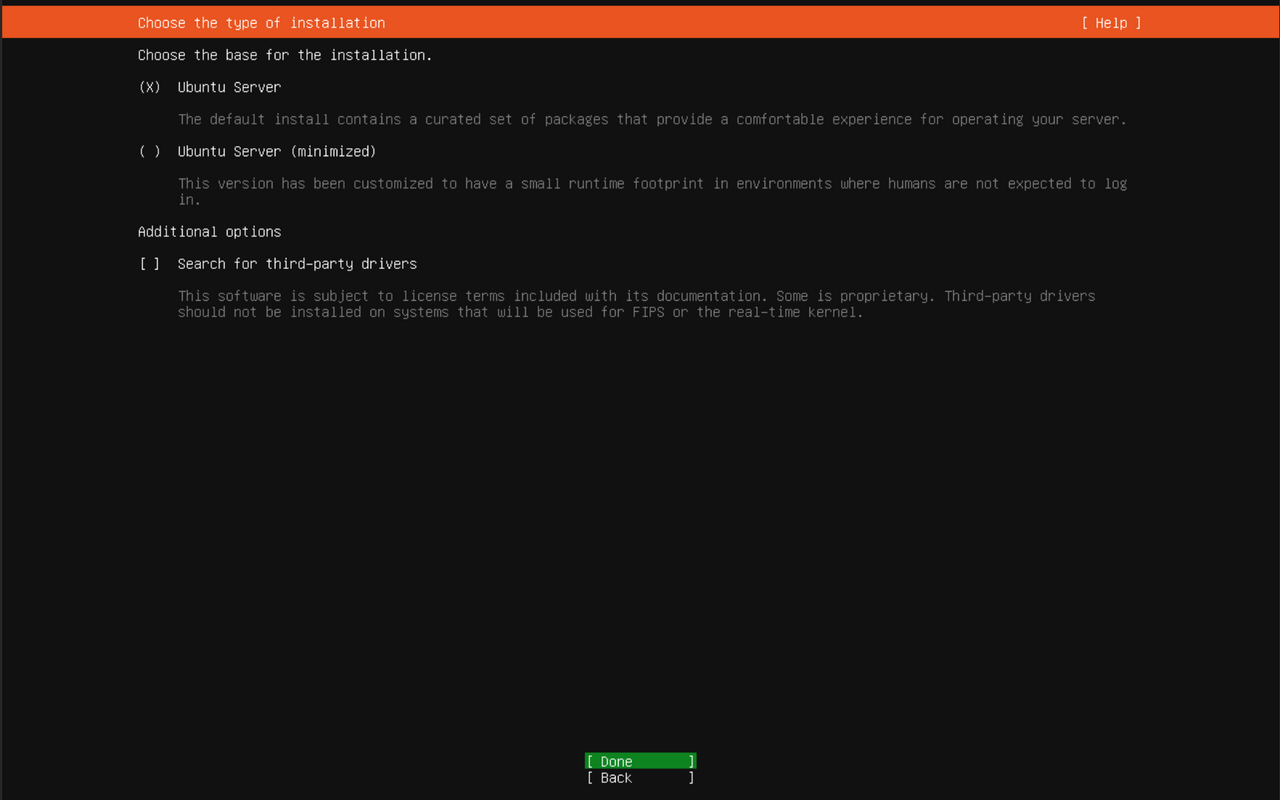
Network. The installer connects through your ethernet cable on its own. Once an address appears under your connection (the 192.168... line in the picture), choose Done.
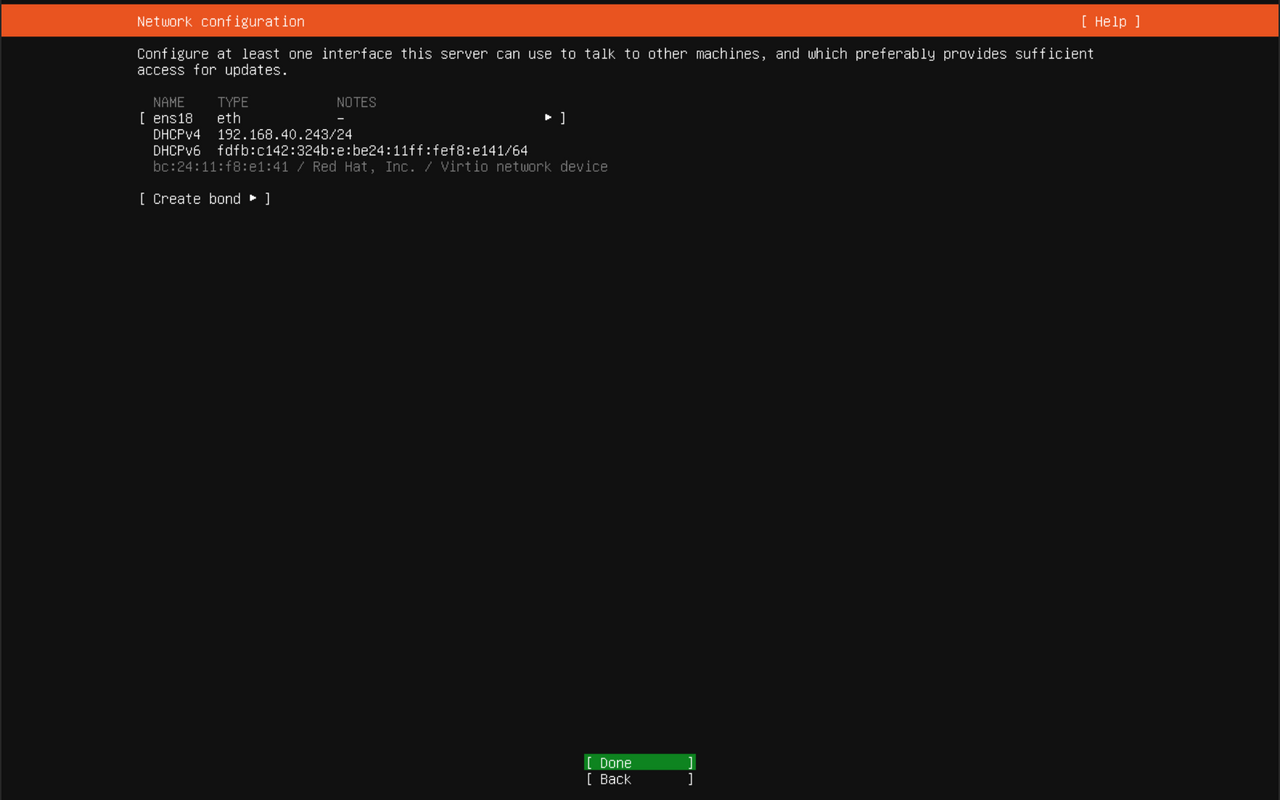
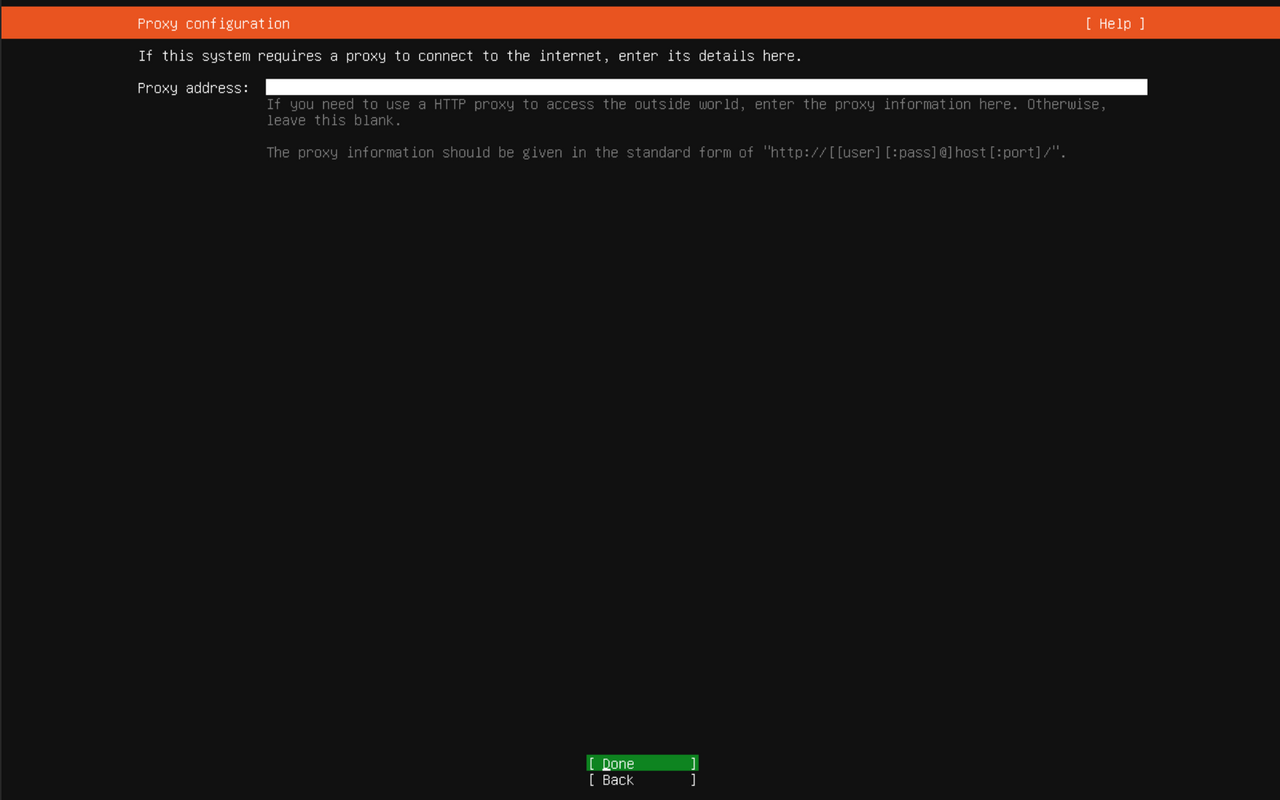
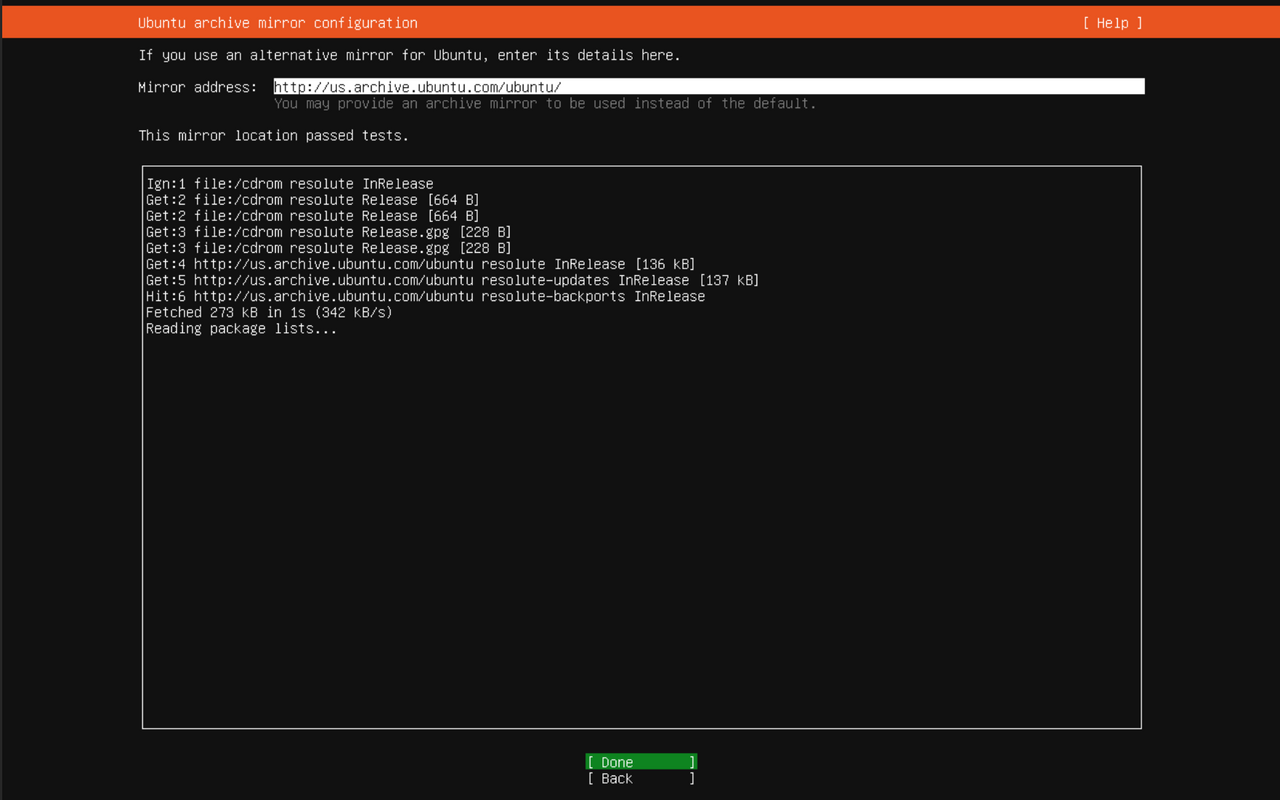
Proxy and mirror. These two screens are for networks that send traffic through a proxy or download updates from a different server. Leave both as they are and choose Done on each.
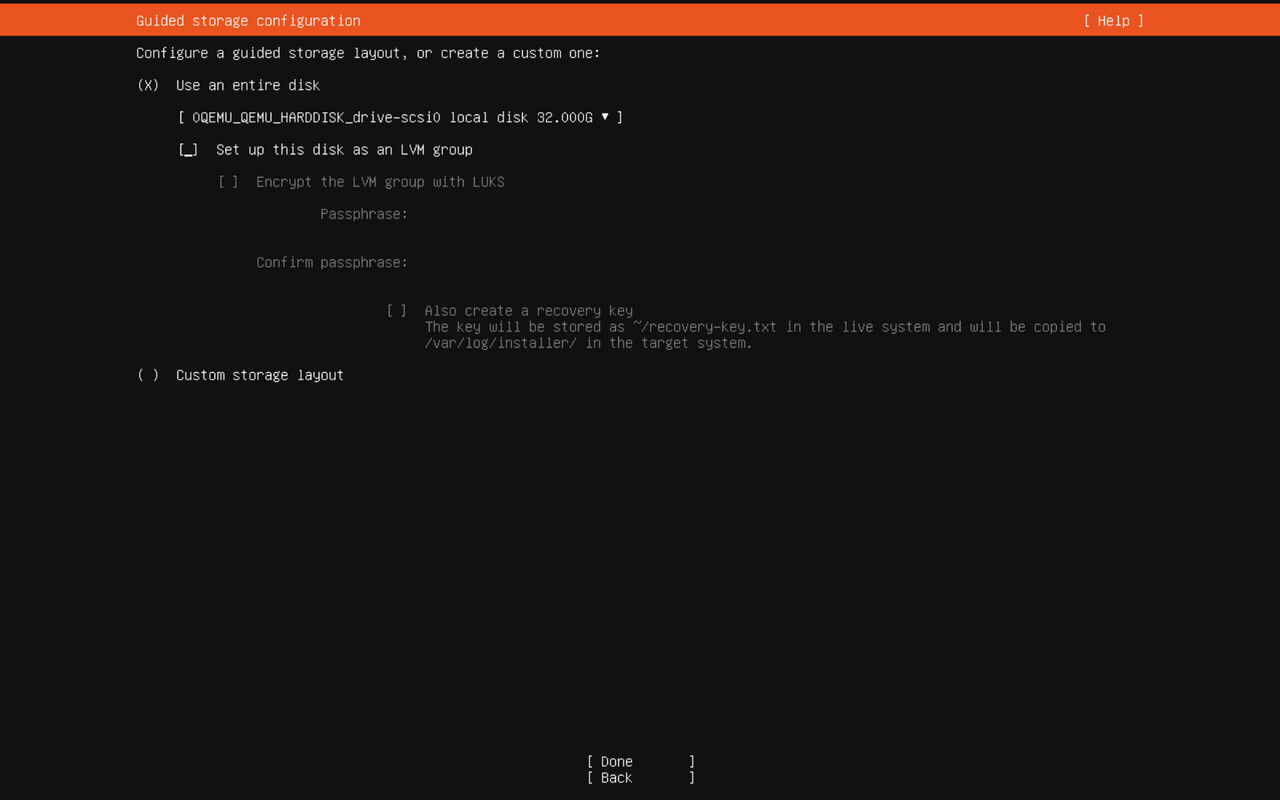
Storage. Choose Use an entire disk, then uncheck Set up this disk as an LVM group. With LVM on, Ubuntu only uses part of the drive at first. With it off, your server gets the whole drive.
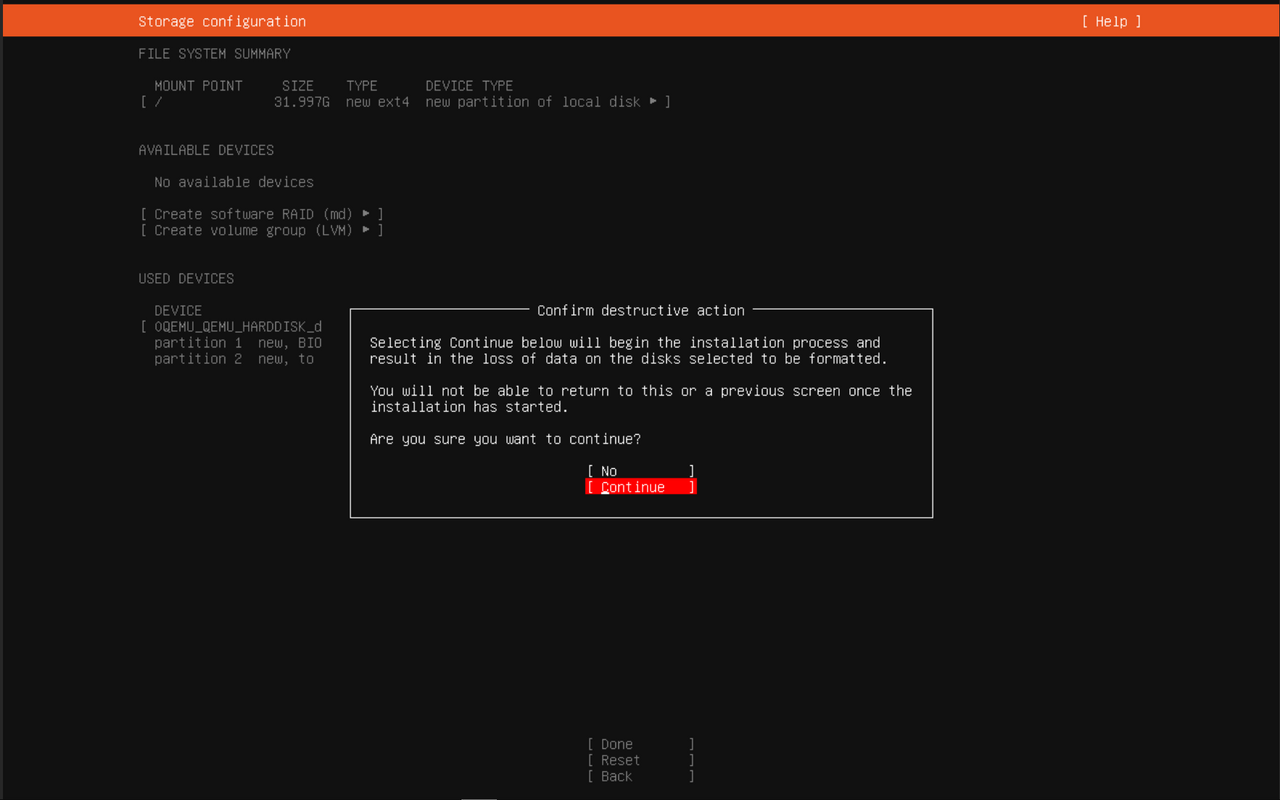
The next screen is a summary. Choose Done, and a box asks you to confirm. This is the step that wipes the computer. Choose Continue.
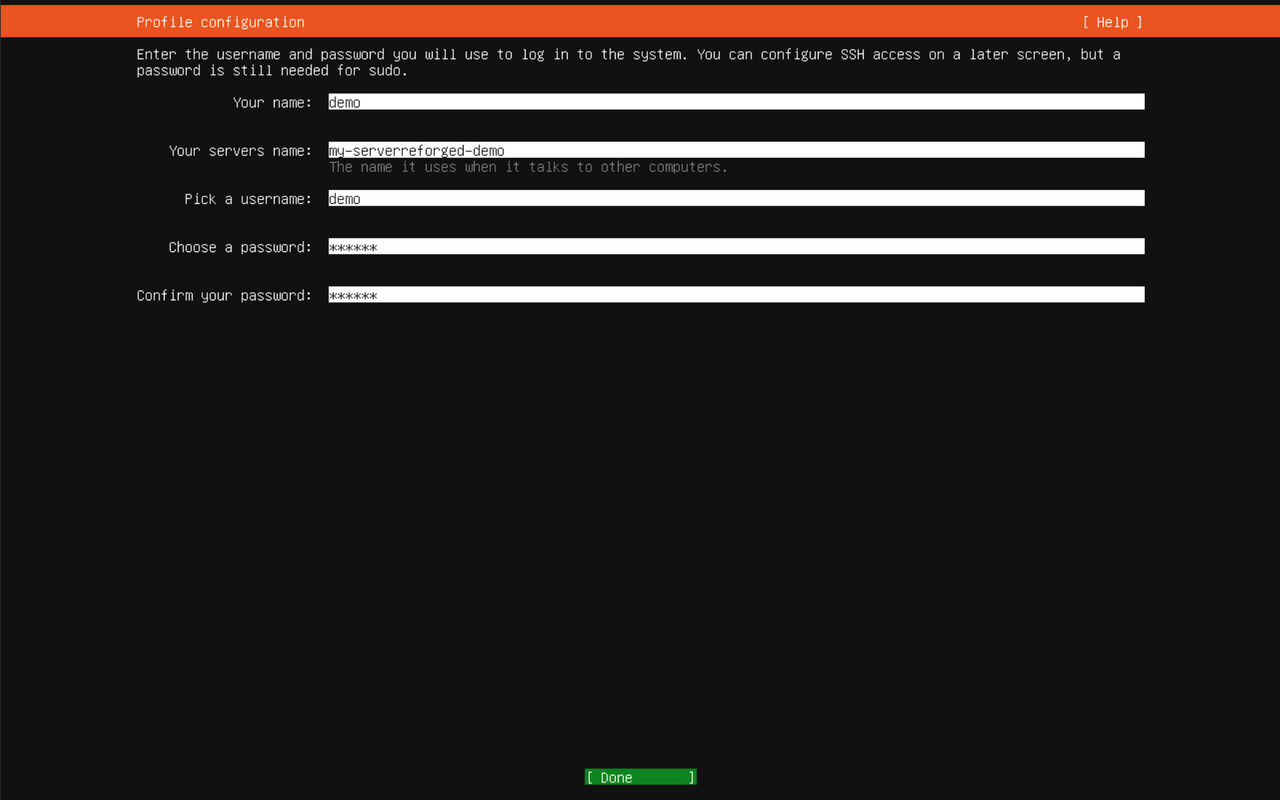
Profile. Enter your name, a name for the computer, a username, and a password. Write the username and password down somewhere safe. You’ll need them to log in later.
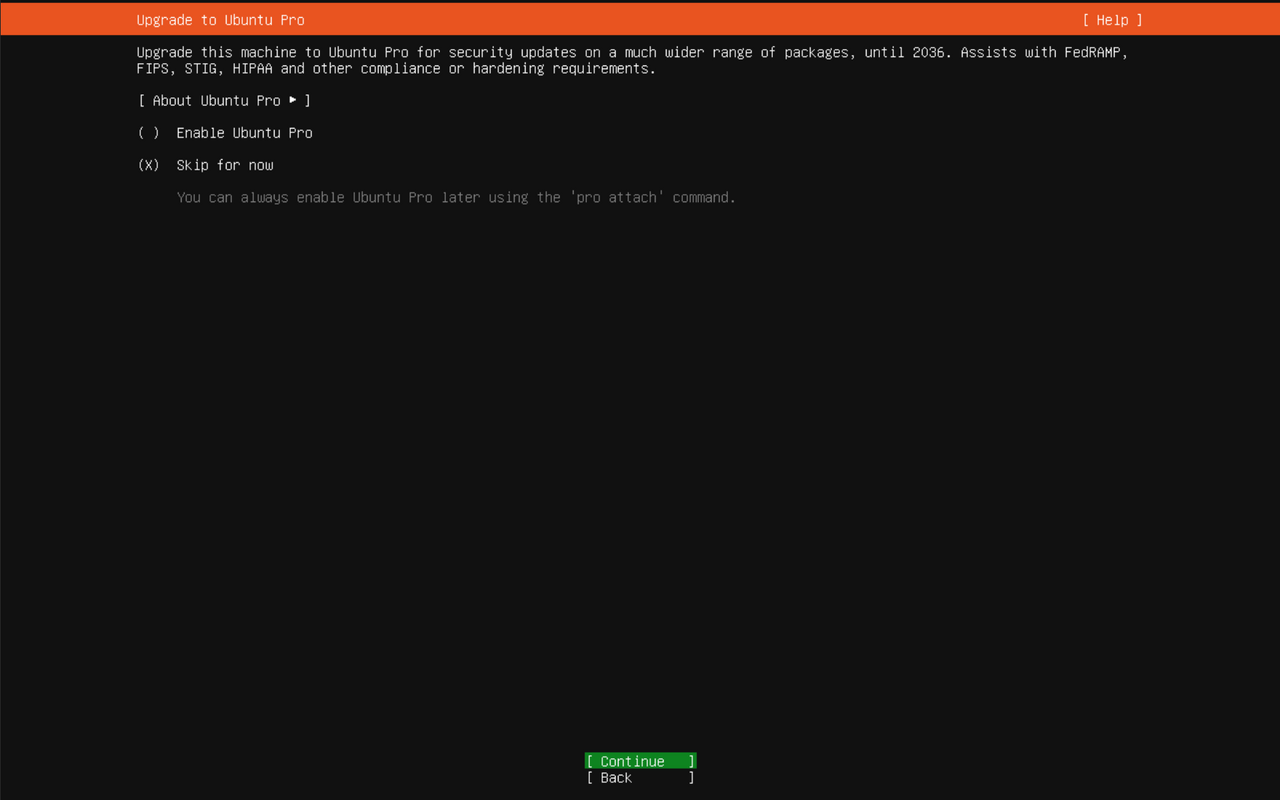
Ubuntu Pro. Choose Skip for now. Ubuntu Pro is an optional subscription, and your server doesn’t need it.
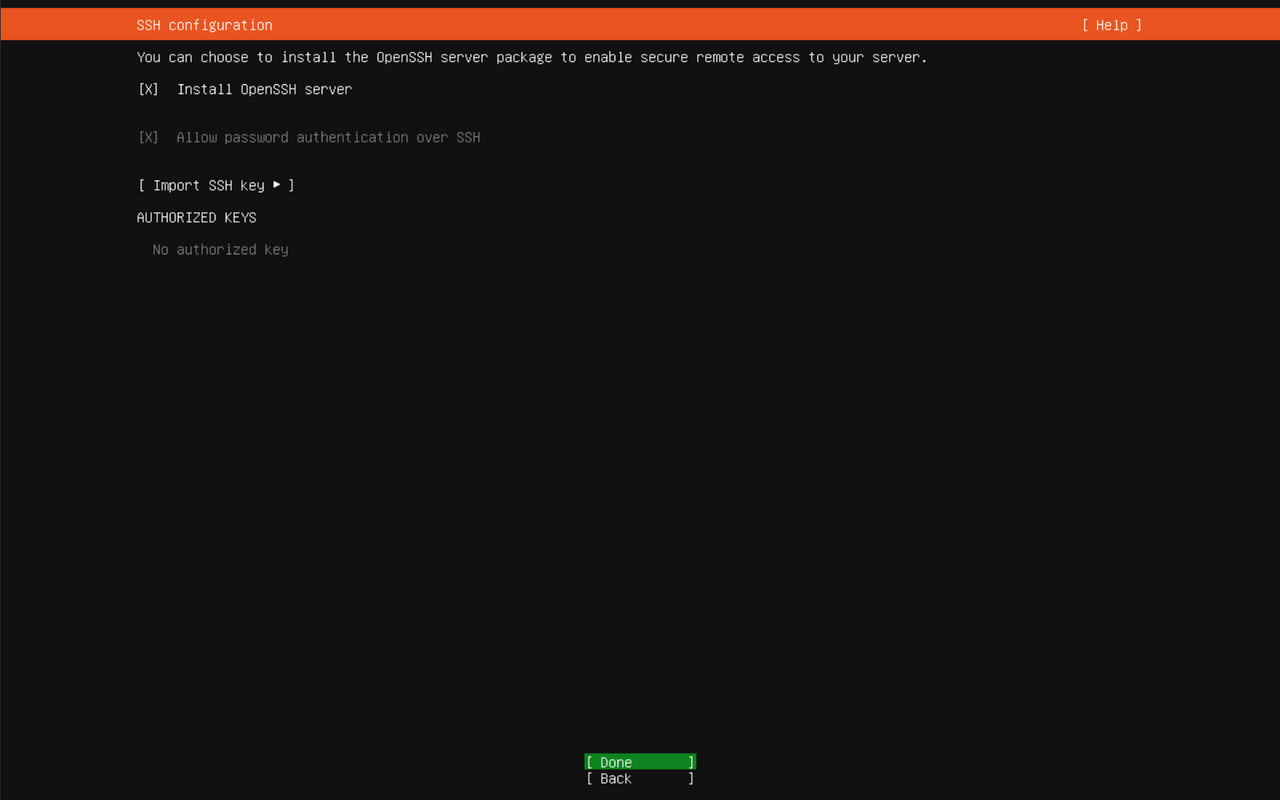
SSH. Check Install OpenSSH server. This lets you paste commands into the server from your normal computer, instead of typing them on the server’s own keyboard. Leave Import SSH key alone.
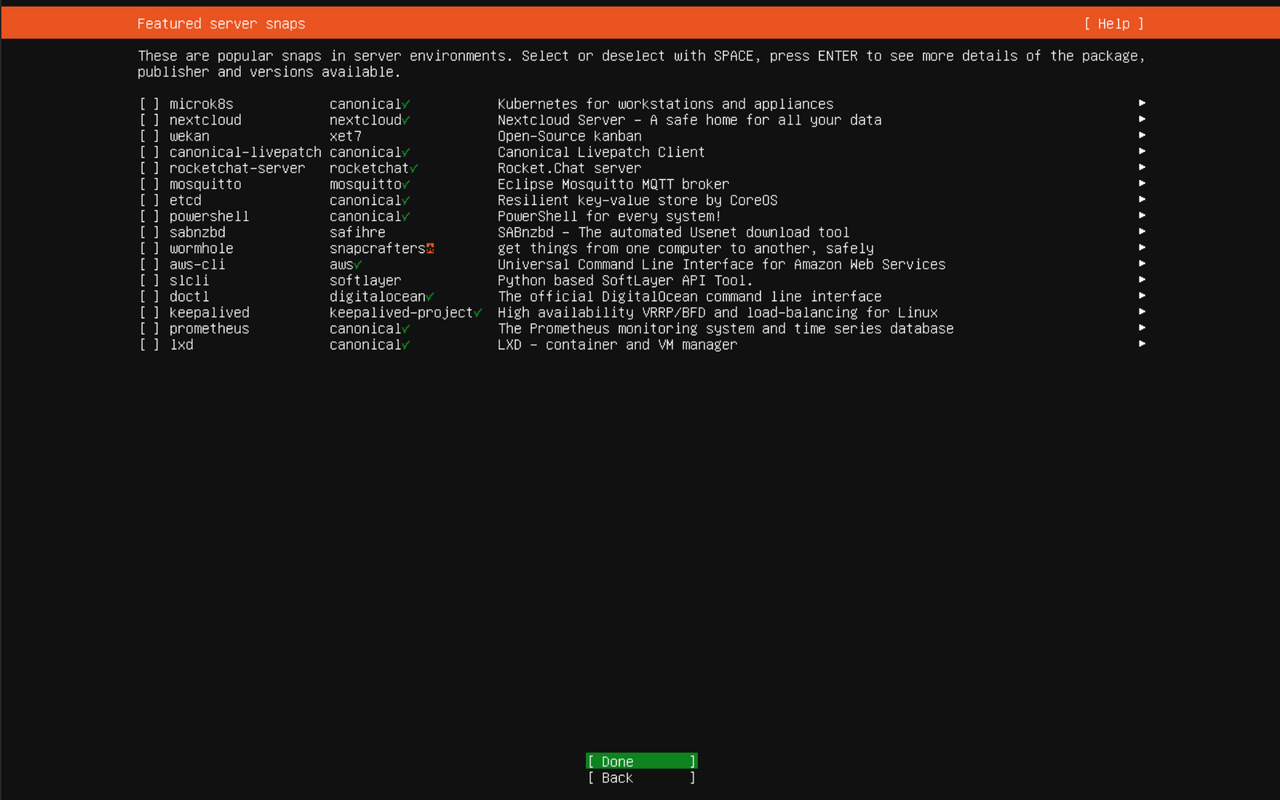
Featured software. Leave everything unselected and choose Done.
The install runs for a few minutes. When it says Installation complete, choose Reboot Now.
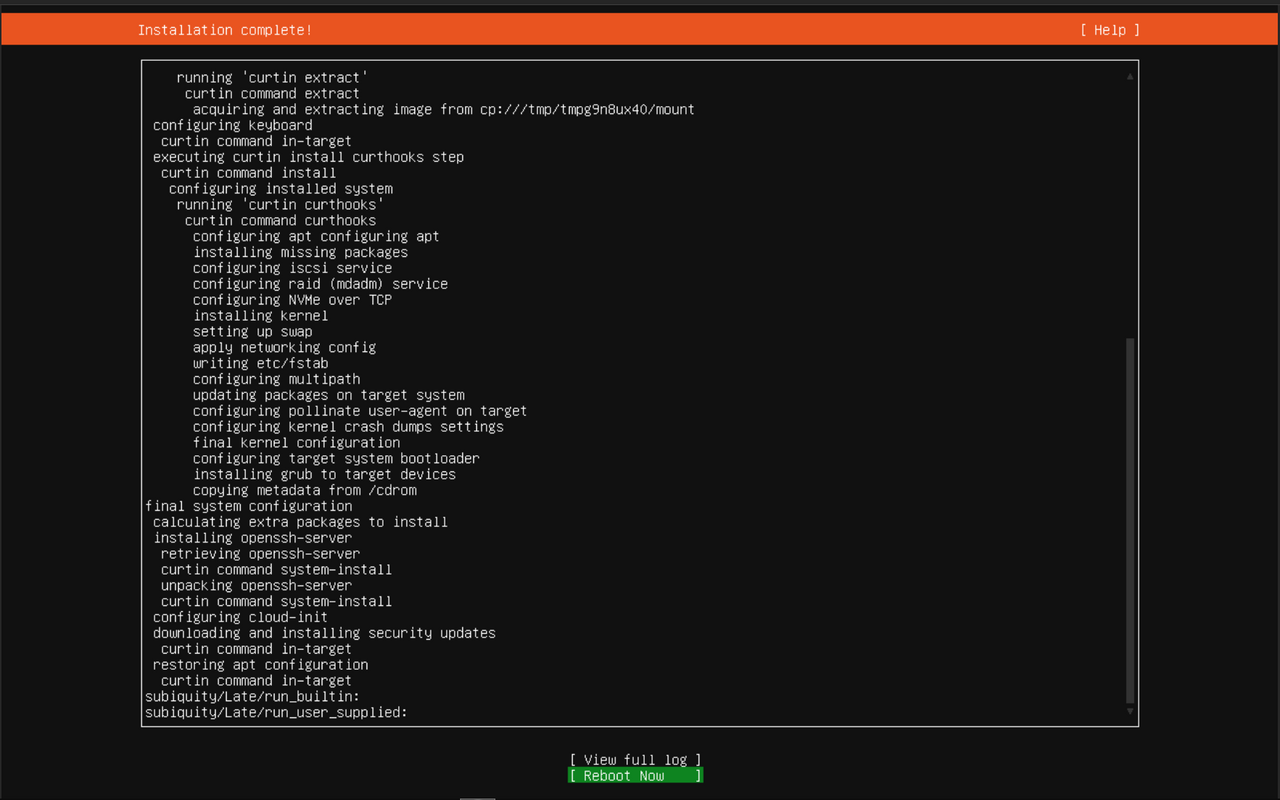
When it asks, pull the USB stick out and press Enter.

Step 5: Log in
After it restarts, you’ll see a plain text screen asking you to log in.
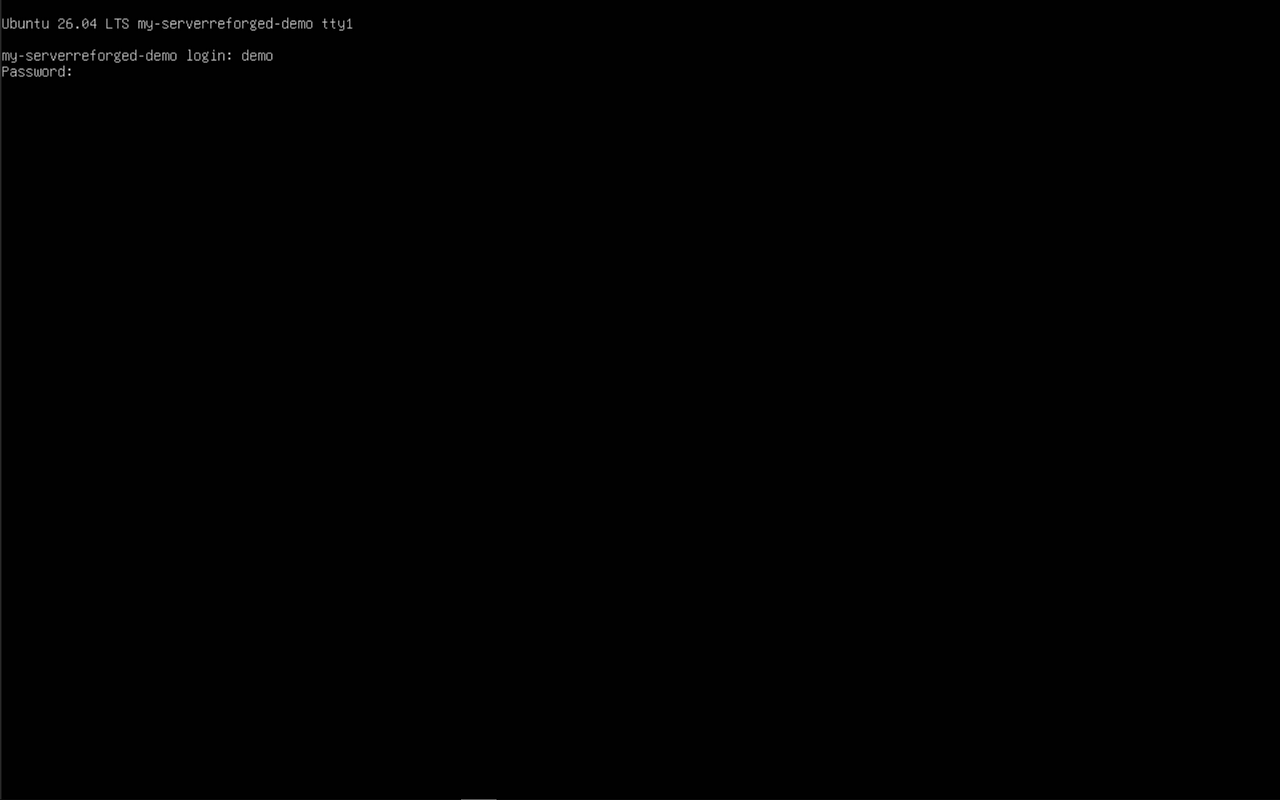
- Type the username you chose and press Enter.
- Type the password and press Enter. Nothing appears on screen while you type the password. That’s normal.
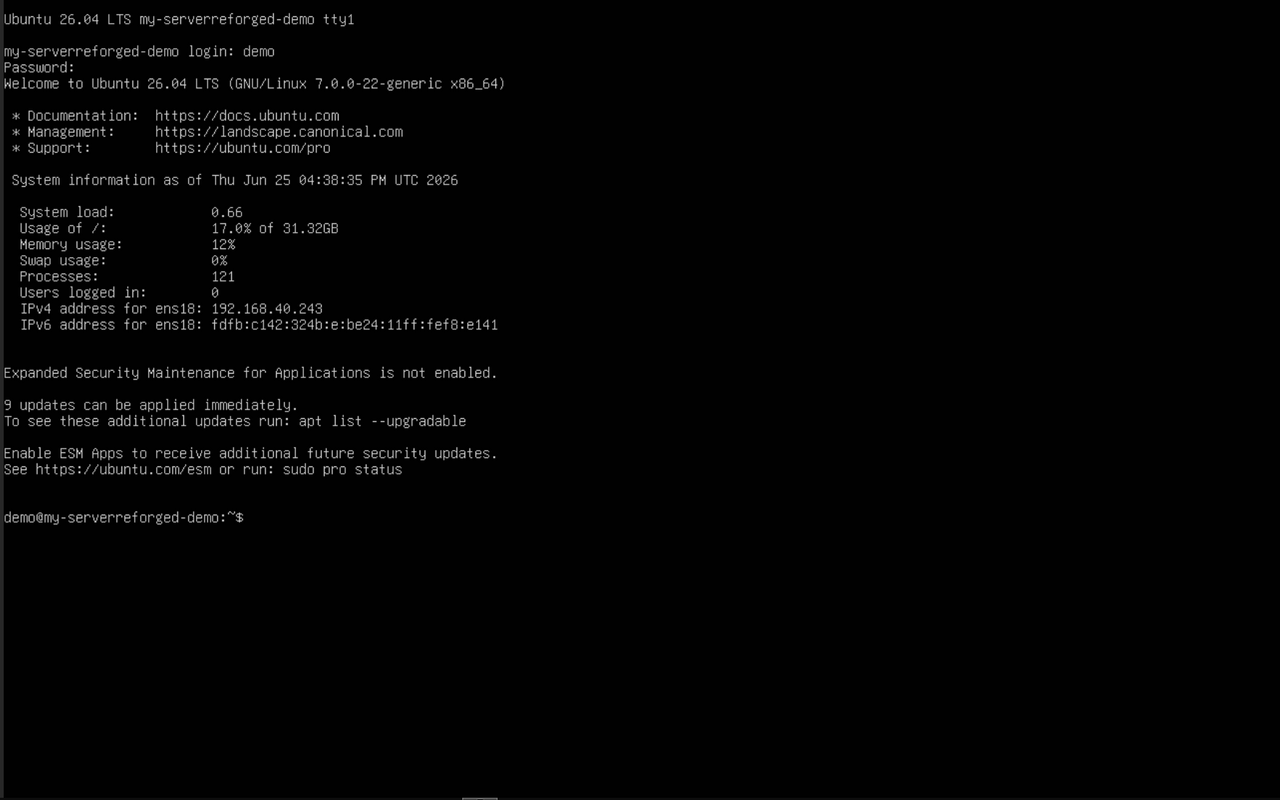
A line ending in $ means you’re logged in:
That’s the longest part of the setup. Next, connect your computer to Server Reforged.